
Build Your First Webhook: Capture PandaDoc Events with Google Sheets
In this tutorial, we will build a complete webhook integration that captures PandaDoc events and writes document data to Google Sheets with secure signature verification.
What You'll Accomplish
In this tutorial, we will build a secure webhook integration that automatically captures PandaDoc document events (created, sent, completed, etc.) and writes the document data to a Google Sheet. By the end, you'll have a working system that tracks your document lifecycle in real-time.
Prerequisites
Before we begin, you'll need:
- A PandaDoc account
- A Google account with access to Google Sheets
- Basic understanding of JavaScript (for Google Apps Script)
Use Cases
This integration is perfect for:
- Learning how to build a webhook integration
- Creating custom document reporting dashboards
- Tracking document lifecycle for compliance
- Building inventory tracking from document data
- Automating follow-up processes based on document status
Step 1: Create Your Google Sheet
First, we'll create a new Google Sheet to store our webhook data.
-
Open Google Sheets and create a new blank sheet
-
(Optional) Give your sheet a descriptive name like "PandaDoc Webhook Data"
-
(Optional) In the first row, we'll add headers for the data we want to track:
- Column A: Document ID
- Column B: Document Name
- Column C: Status
- Column D: Created Date
- Column E: Modified Date
- Column F: Expiration Date
- Column G: Created By Email
- Column H: Currency
- Column I: Amount
You can copy and paste the following headers into your sheet:
Document ID Document Name Status Created Date Modified Date Expiration Date Created By Email Currency Amount
You now have a structured sheet ready to receive webhook data.
Step 2: Create the Google Apps Script
Now we'll create the script that will process incoming webhook requests.
- In your Google Sheet, click Extensions from the menu bar
- Select Apps Script
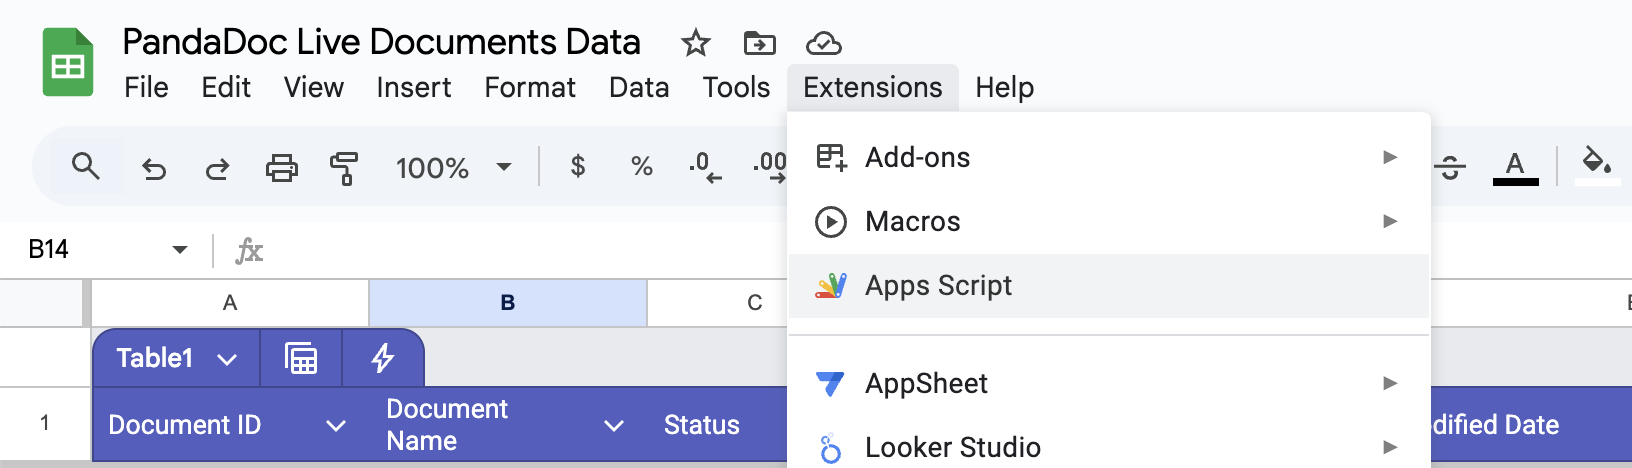
- Replace the default
Code.gscontent with our webhook handler:
// Required function for Google Apps Script web app
// Handles GET requests (for webhook endpoint verification)
function doGet(e) {
  return HtmlService.createHtmlOutput("PandaDoc Webhook Endpoint Ready");
}

// Main webhook handler - processes POST requests from PandaDoc
function doPost(e) {
  // TODO: For now just keep it as is, we will update it once we have the shared key. Replace with your actual shared key from PandaDoc webhook settings
  var sharedKey = "[Your Shared Key]";

  // Update this if your sheet has a different name
  var sheetName = "Sheet1";

  try {
    // Extract signature and payload from PandaDoc request
    var pandadocSignature = e.parameter.signature;
    var payload = e.postData.contents;

    // Generate signature for verification
    var byteArraySig = Utilities.computeHmacSha256Signature(payload, sharedKey);
    var generatedSignature = byteArraySig.reduce(function (str, chr) {
      chr = (chr < 0 ? chr + 256 : chr).toString(16);
      return str + (chr.length == 1 ? "0" : "") + chr;
    }, "");

    // Verify the webhook is from PandaDoc
    if (pandadocSignature != generatedSignature) {
      throw new Error("Webhook signature verification failed");
    }

    // Parse webhook data and extract document information
    var webhookData = JSON.parse(payload);
    var documentData = webhookData[0].data;
    var sheet = SpreadsheetApp.getActiveSpreadsheet().getSheetByName(sheetName);

    // Add document data to our sheet
    sheet.appendRow([
      documentData.id,
      documentData.name,
      documentData.status,
      documentData.date_created,
      documentData.date_modified,
      documentData.expiration_date,
      documentData.created_by.email,
      documentData.grand_total.currency,
      documentData.grand_total.amount,
    ]);
  } catch (error) {
    // Log any errors to the sheet for debugging
    var sheet = SpreadsheetApp.getActiveSpreadsheet().getSheetByName(sheetName);
    sheet.appendRow(["ERROR: " + error.message, new Date()]);
  }

  return HtmlService.createHtmlOutput("Webhook processed successfully");
}- Save your project with a descriptive name like "PandaDoc Webhook Handler"
You now have a complete webhook handler that will securely process PandaDoc events.
Step 3: Deploy Your Web App
Now we'll make your script available as a web endpoint that PandaDoc can send webhooks to.
- Click Deploy from the menu bar
- Select New deployment

- Configure your deployment:
- Type: Select "Web app" from the gear icon
- Description: Enter "PandaDoc Webhook Integration v1"
- Execute as: Me (your account)
- Who has access: Anyone
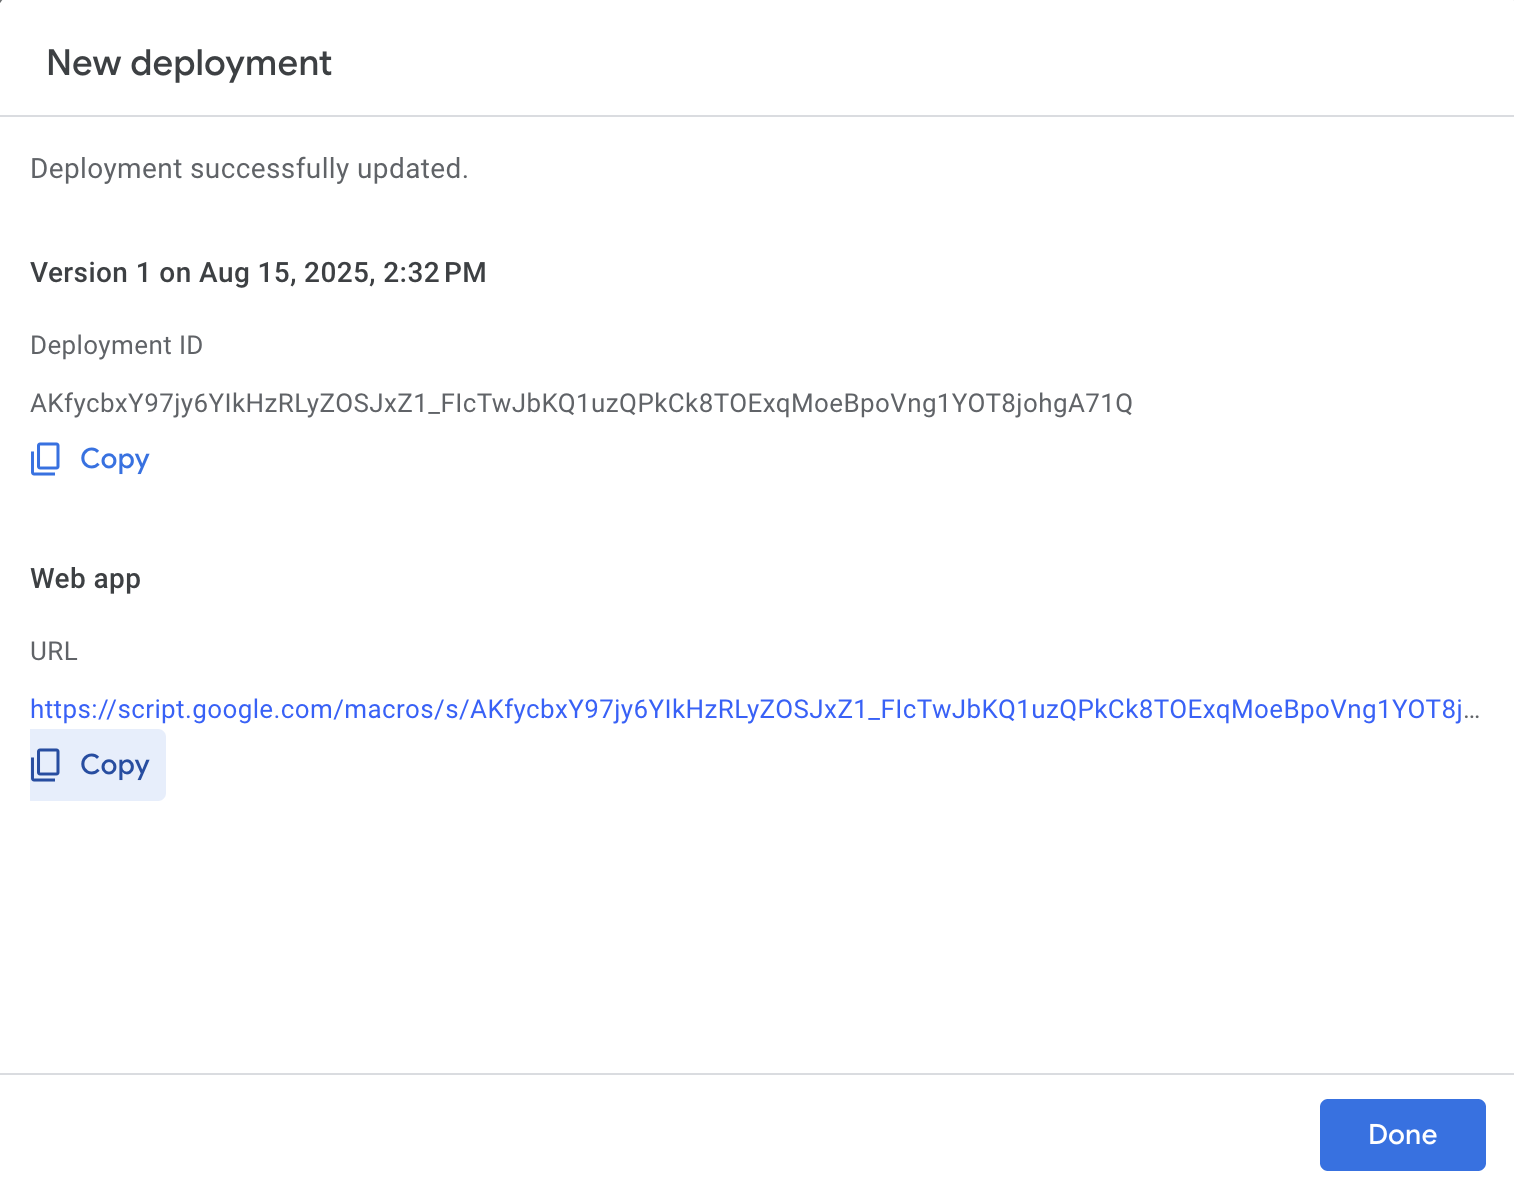
- Click Deploy
- If prompted, review and authorize the required permissions
- Important: Copy the web app URL from the success dialog - you'll need this for the next step
The URL will look like: https://script.google.com/macros/s/[LONG-ID]/exec
Congratulations! You now have a live webhook endpoint ready to receive PandaDoc events.
Step 4: Create Your PandaDoc Webhook
Now we'll configure PandaDoc to send webhook events to your Google Apps Script.
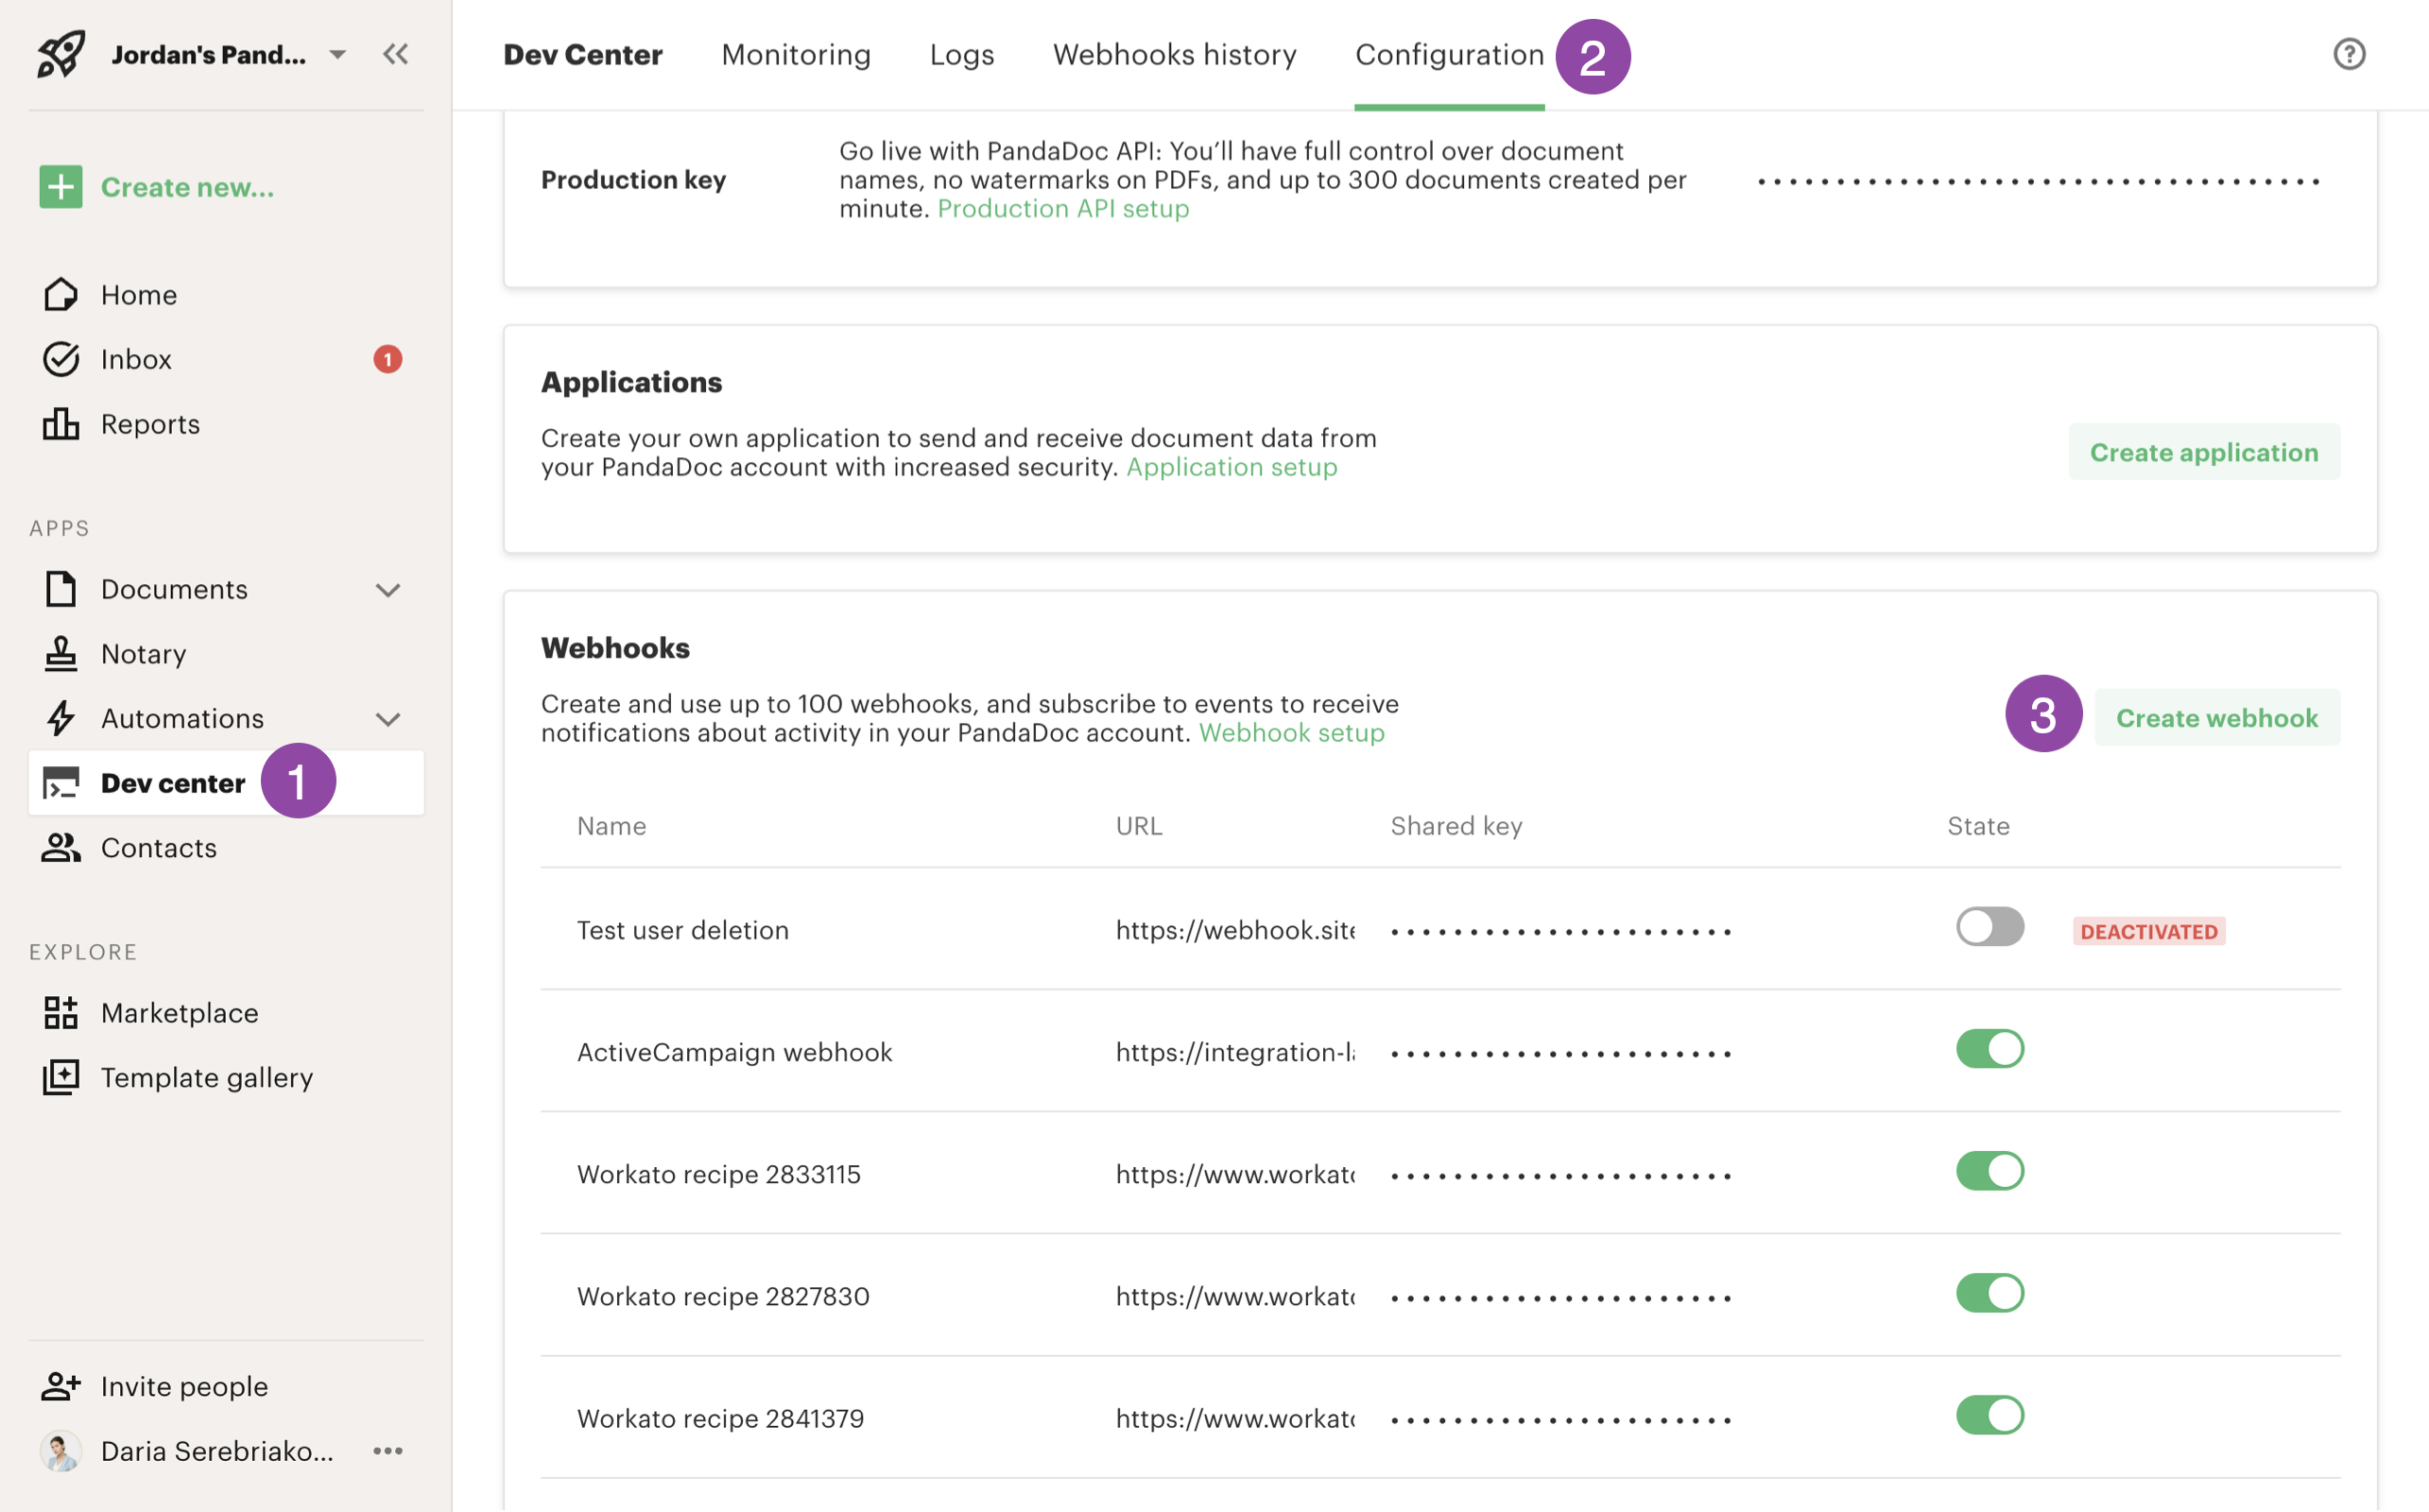
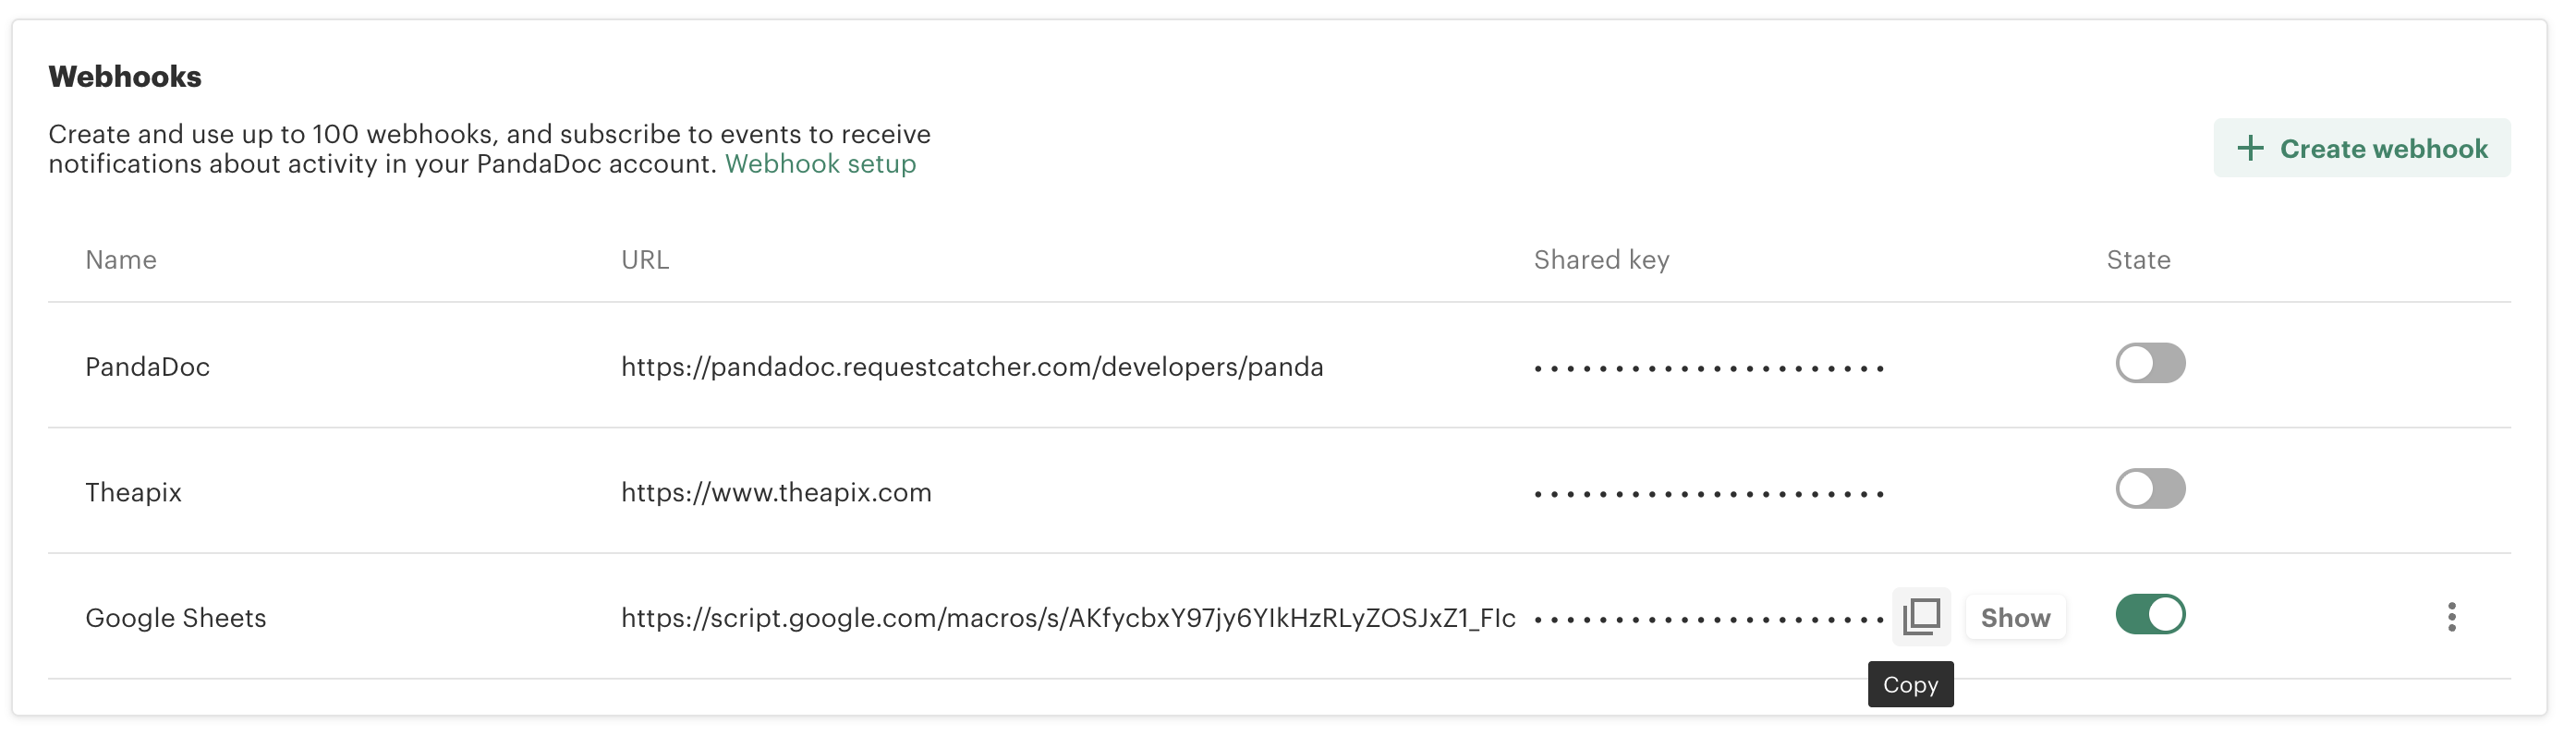
- Open the PandaDoc API Configuration page
- In the Webhooks section, click Create webhook
- Configure your webhook:
- Name: "Google Sheets Integration"
- Webhook endpoint URL: Paste the URL you copied from Google Apps Script
- Events: Select the document events you want to track (e.g., document.completed, document.sent)
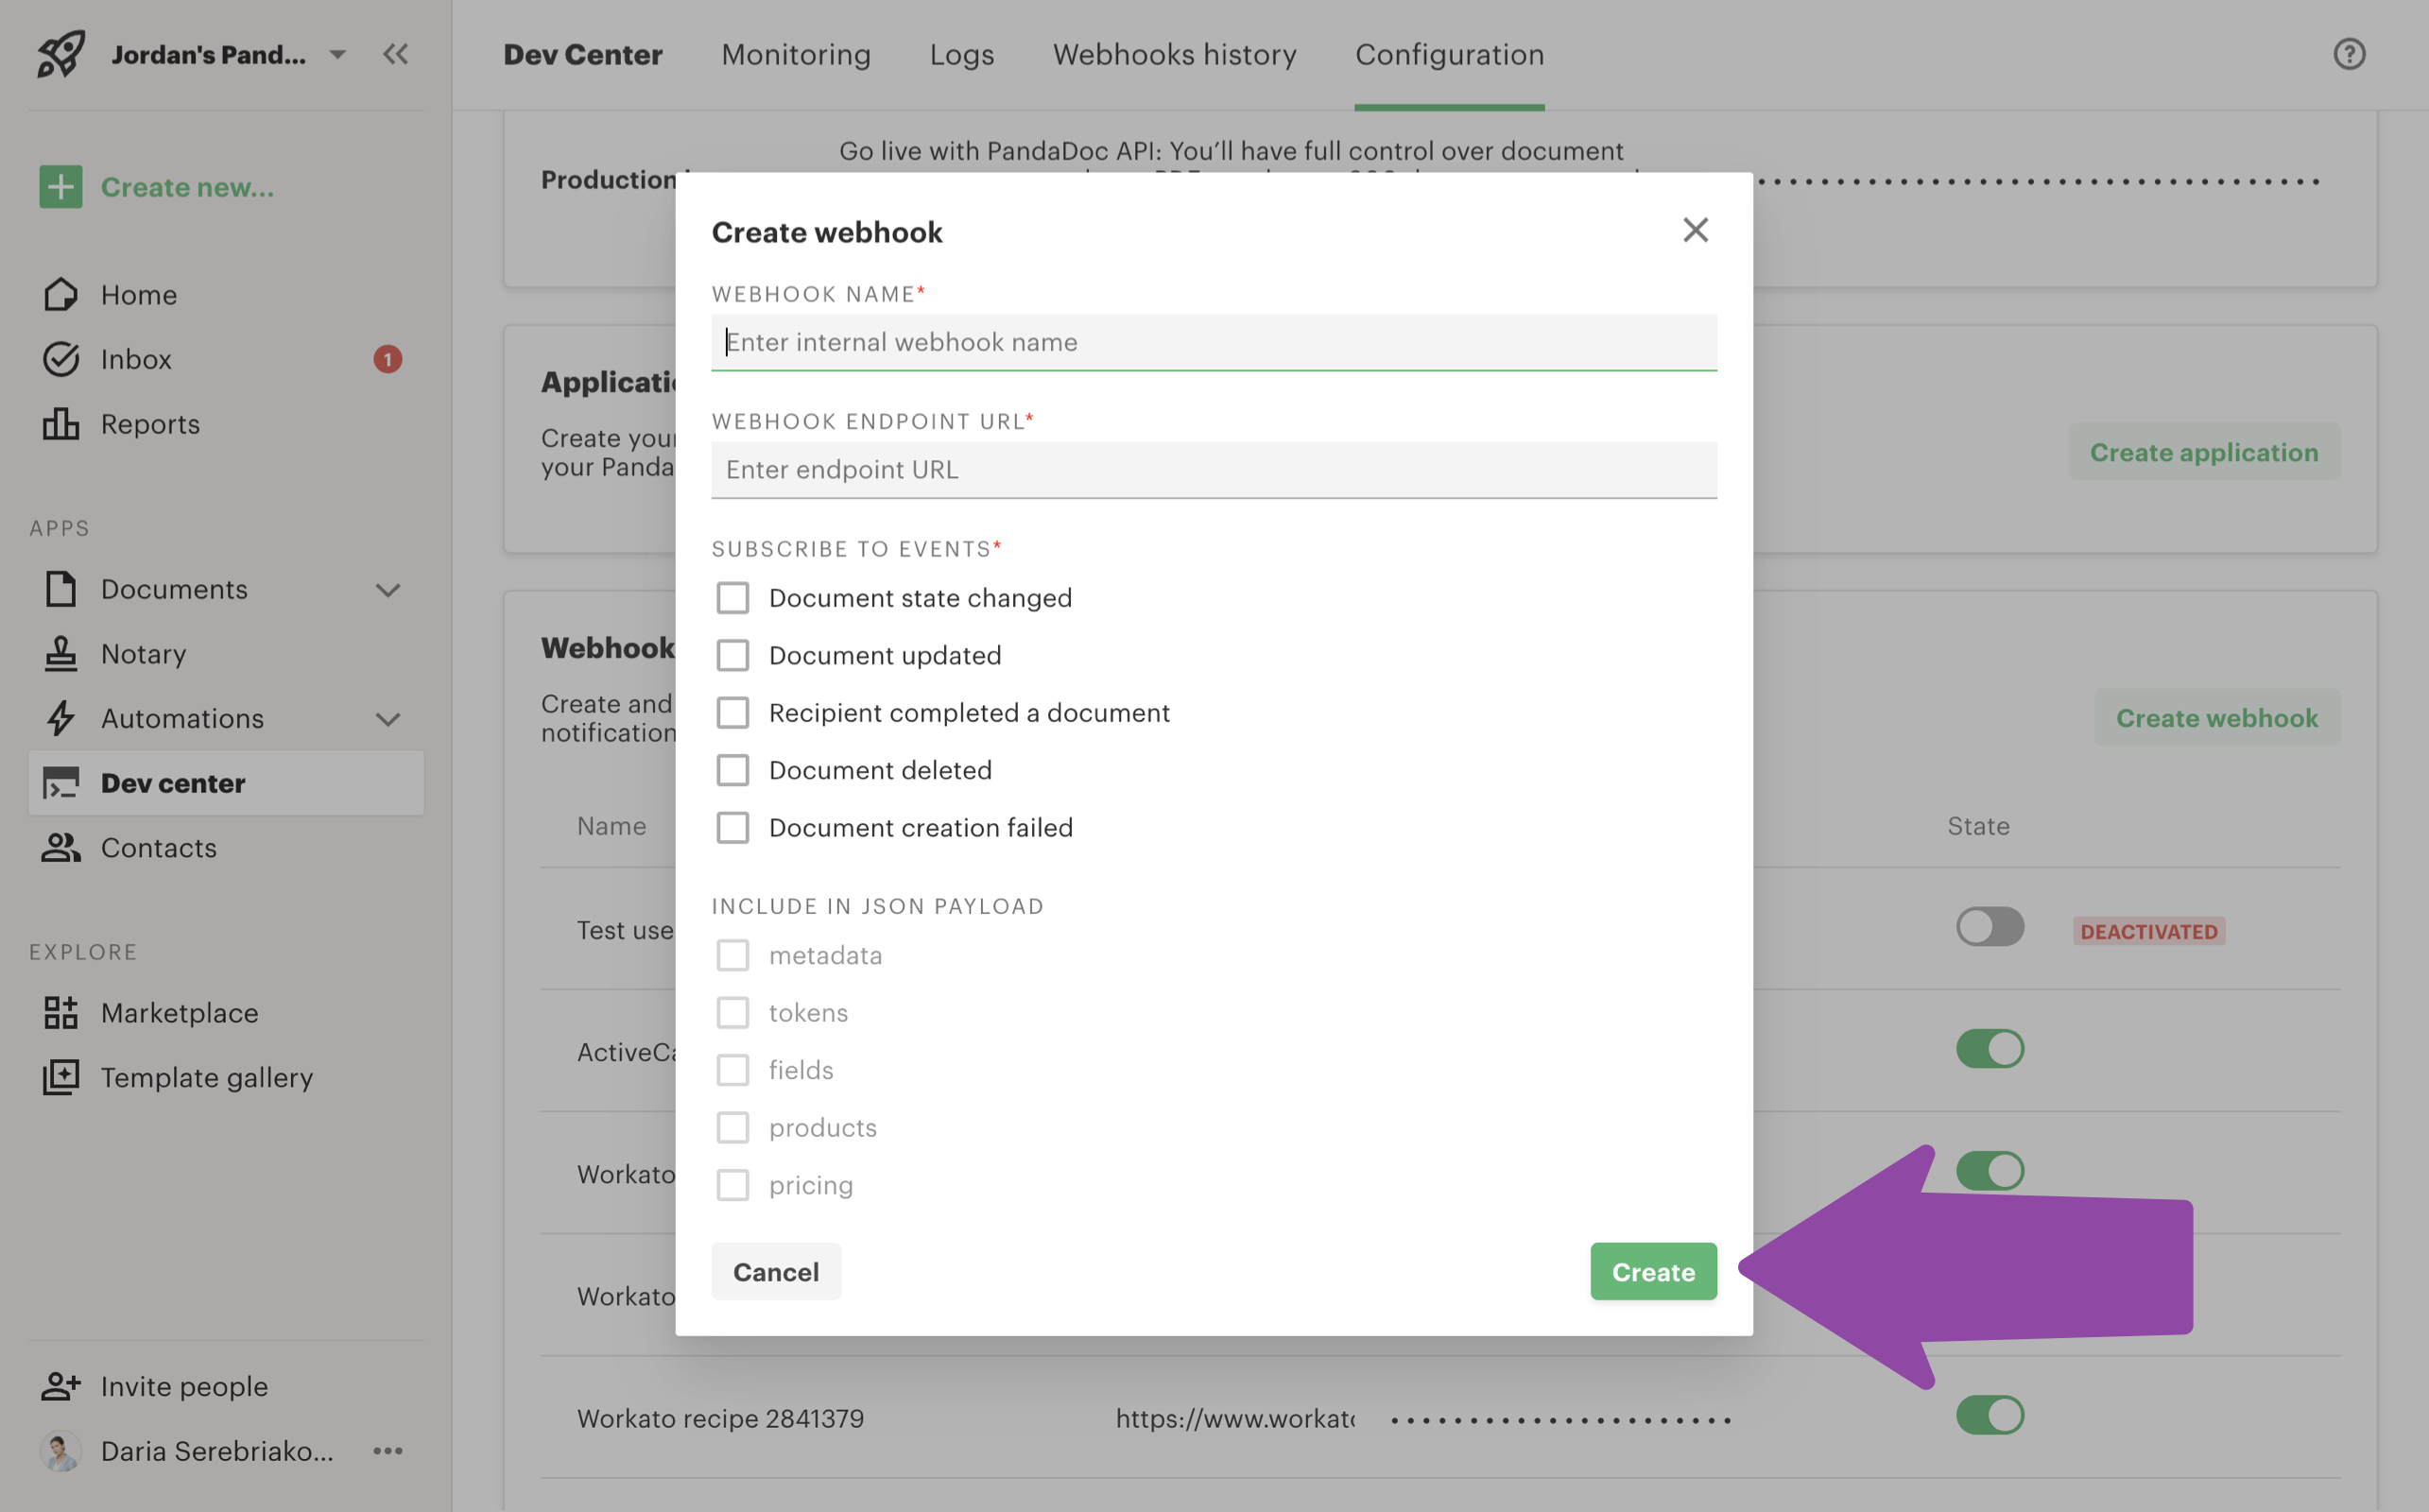
-
Click Save to create your webhook
-
Important: Copy the Shared Key - we'll need this to update our script
You now have a PandaDoc webhook configured to send events to your Google Sheet.
Step 5: Update Your Script with the Shared Key
We need to add your webhook's shared key to enable signature verification.
- Return to your Google Apps Script project
- Find line 7 in your code:
var sharedKey = "[Your Shared Key]"; - Replace
[Your Shared Key]with the shared key you copied from PandaDoc:
var sharedKey = "your-actual-shared-key-here";
- If your sheet name is different from "Sheet1", update line 10 accordingly:
var sheetName = "Your Actual Sheet Name";-
Save your changes
-
Deploy a new version:
- Click Deploy > Manage deployments
- Click the edit icon on your existing deployment
- Select New version
- Click Deploy
- Important: Copy the new web app URL that appears after deployment
-
Update your PandaDoc webhook with the new URL:
- Return to PandaDoc API Configuration
- Edit your webhook settings
- Update the Webhook endpoint URL with the new URL from step 6
- Save the webhook
Important Note: Each time you deploy a new version of your Google Apps Script, a new URL is generated. You must update your PandaDoc webhook with this new URL for it to continue working.
Step 6: Test Your Integration
Let's verify everything is working correctly.
-
In PandaDoc, create a new document (or perform any action that triggers your selected webhook events)
-
Check your Google Sheet - you should see a new row with document data similar to this:
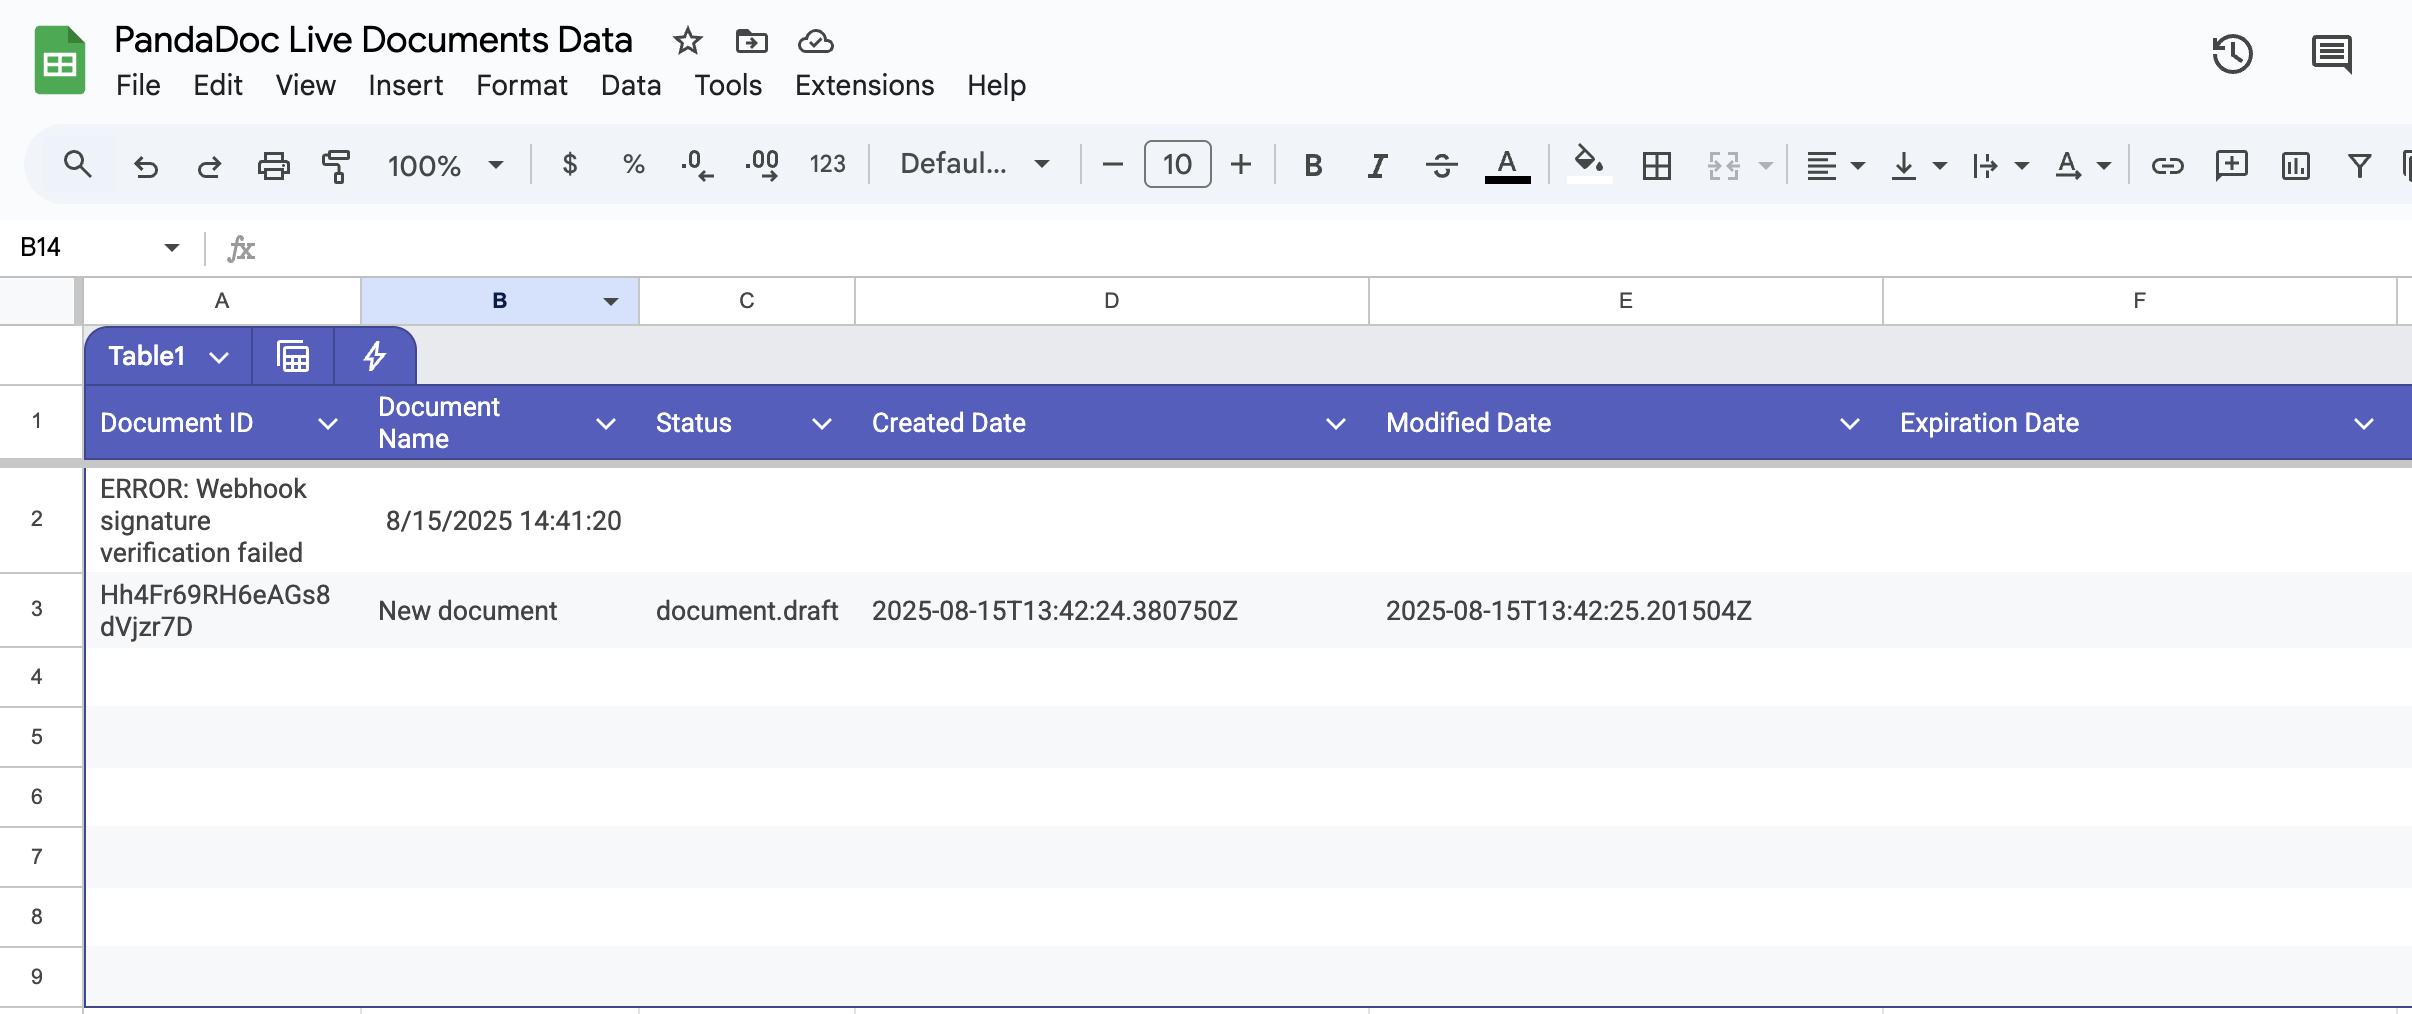
If you see data appearing in your sheet, congratulations! Your webhook integration is working.
Troubleshooting
If you see an error message in your Google Sheet instead of document data, the most common issue is a signature verification failure. This typically means:
- The shared key in your script doesn't match the one in PandaDoc
- The webhook URL in PandaDoc doesn't match your deployed script URL
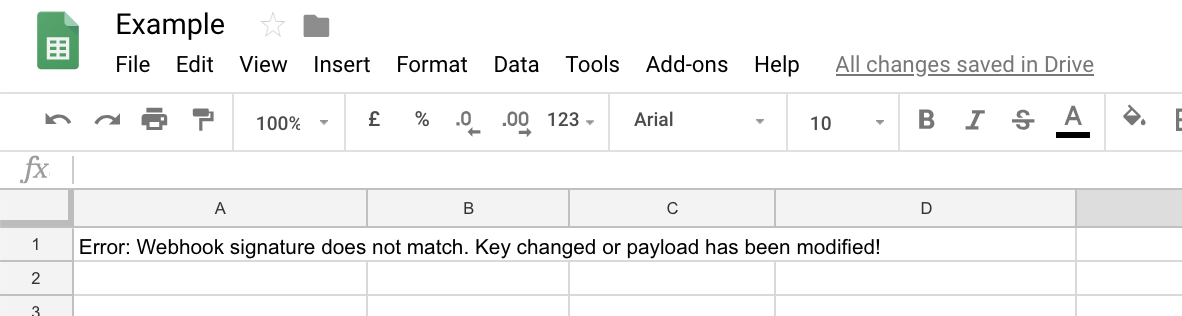
To fix this, double-check that your shared key and webhook URL are correctly configured.
What You've Built
You've successfully built a secure, real-time webhook integration that:
- ✅ Captures PandaDoc document events automatically
- ✅ Verifies webhook authenticity using signature validation
- ✅ Stores document data in an organized Google Sheet
- ✅ Handles errors gracefully with logging
Next Steps
Now that you have a working webhook integration, you can:
- Customize the data: Modify the script to capture additional webhook fields
- Add automation: Use Google Sheets formulas or Apps Script to trigger actions based on document status
- Build dashboards: Create charts and visualizations from your webhook data
- Learn debugging: Check out our Webhook Debugging Guide to troubleshoot issues
- Webhook Events Reference: For a complete list of available webhook events, see our Webhook Events Reference
You're now ready to build more sophisticated webhook integrations and automate your document workflows!
Updated 8 months ago